
A DNS zone is used to host the DNS records for a particular domain. To start hosting your domain in Azure DNS, you need to create a DNS zone for that domain name. Each DNS record for your domain is then created inside this DNS zone. To publish a private DNS zone to your virtual network, you specify the list of virtual networks that are allowed to resolve records within the zone. These are called linked virtual networks. When auto registration is enabled, Azure DNS also updates the zone records whenever a virtual machine is created, changes its’ IP address, or is deleted.
Let’s create a private DNS Zone!
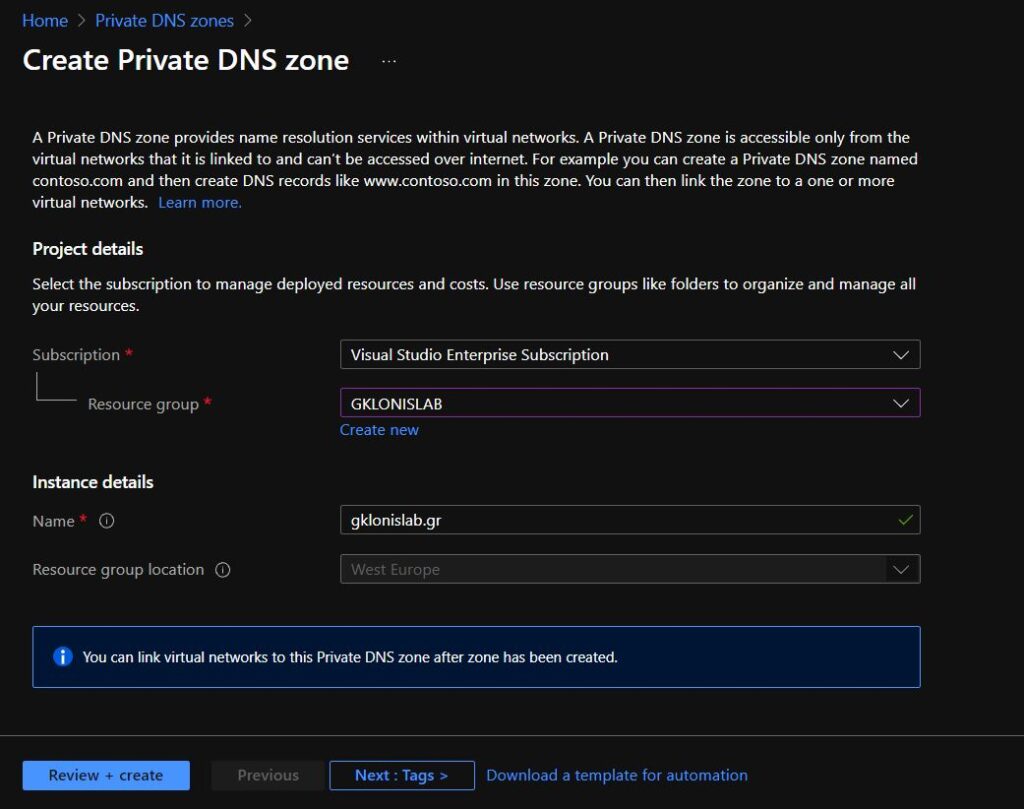
Login to the Azure Portal and on the search bar on top of the page type “private dns zone”. Click on the Private DNS Zone icon and the click create.
On the creation page: select subscription, resource group, the name of your dns zone and then click Review + Create.
Now we have to link the Private DNS Zone with an Azure VNet.
Go to Virtual Network Links and then Click Add.
Give a name, the subscription and select the VNet that you want to link with.
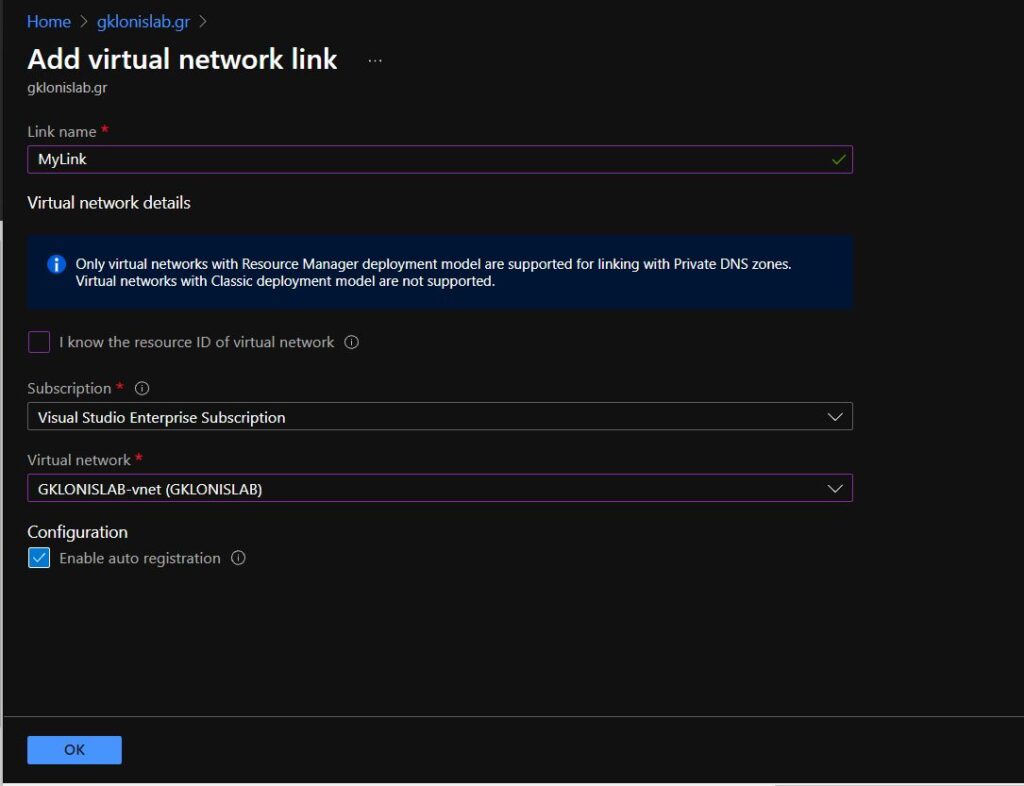
NOTE: The “Enable auto registration” setting enables automatic creation of DNS records in this Private DNS zone, for the virtual machines connected to the virtual network.
Let’s test it.
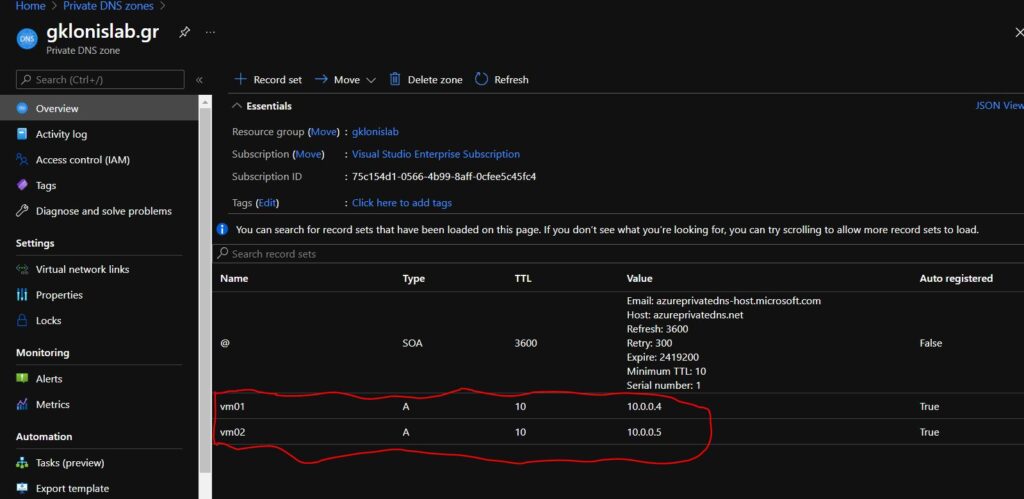
I just created 2 Virtual Machines.
At first, the auto registration works!
Let’s ping vm02 from vm01 with fqdn…
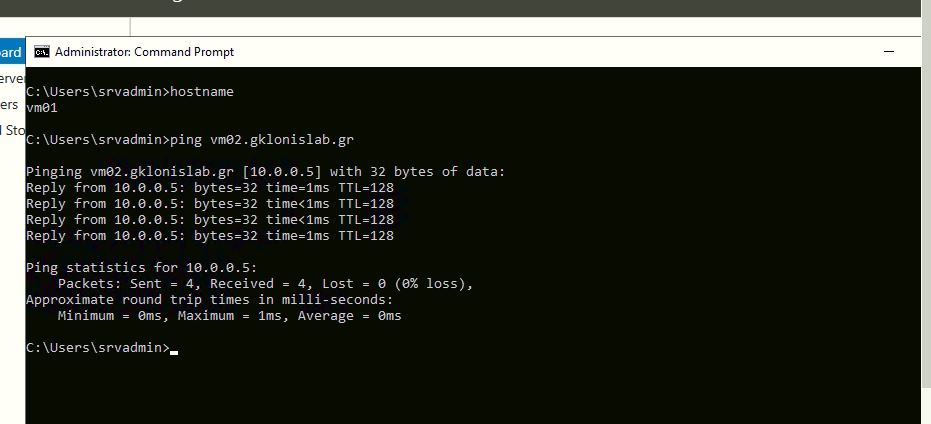
It Works 🙂