
Azure Firewall is a managed, cloud-based network security service that protects your Azure Virtual Network resources. It’s a fully stateful firewall as a service with built-in high availability and unrestricted cloud scalability. Azure firewall allows you to centrally create, enforce and monitor network security policies across Azure subscriptions and virtual networks.
Let’s create a demo on setting up Azure Firewall to see how it works! To do that, before you start, make sure you have meet some prerequisites.
An Azure subscription – trial or with some money
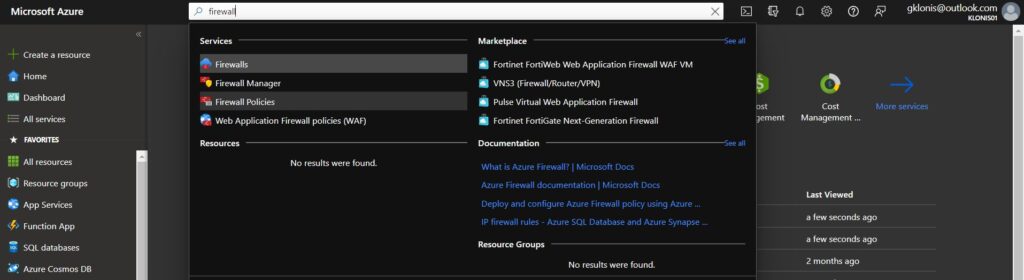
- Open a web browser and navigate to the Azure Portal.
- Search for “firewall” in the Search box and click on Firewalls to open the Firewalls blade.
3. In the Firewalls blade, click Create.
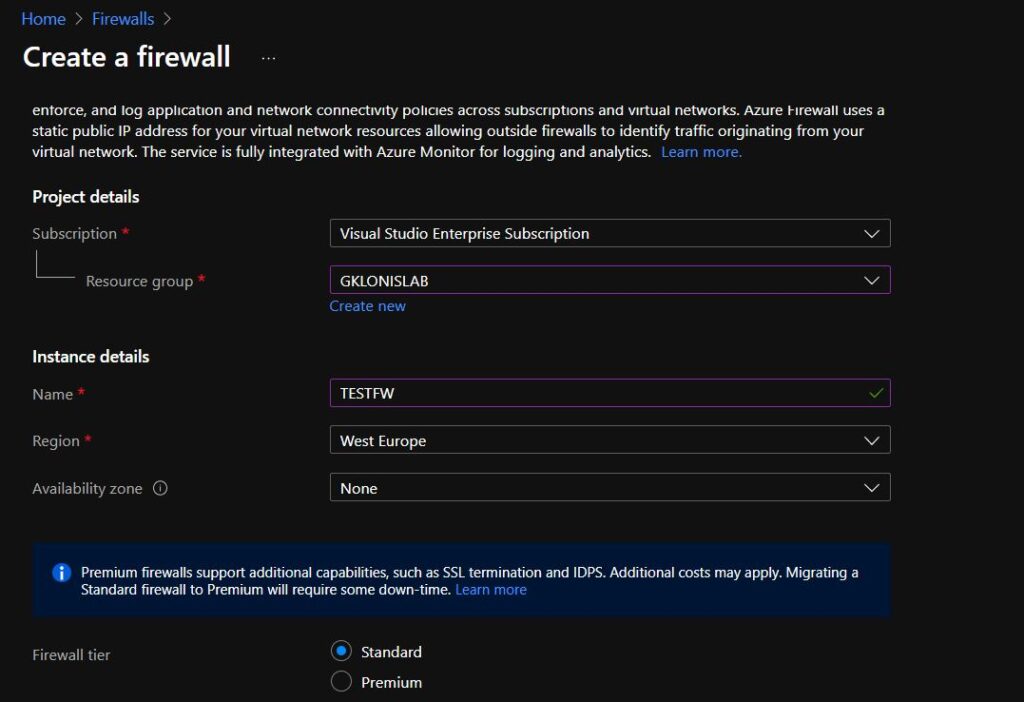
- Provide values for all fields like the Azure subscription you’ll be deploying Azure Firewall into, the resource group (Create a new one if you need to ), and the region.
The region must be in the same region as the vNet you want to protect!
Provide, also a Tier level. I will use the Standard tier. If you need more advanced features like TLS, URL Filtering, and Intrusion Detection and Prevention System (IDPS), choose the Premium tier.
- Next, select how you’d like to manage the firewall, either using a firewall policy or classic rules. I will use firewall policies to manage the firewall.
A firewall policy, unlike classic rules, can be attached to multiple firewalls.
- Next, provide the Virtual network name where Azure Firewall will be deployed.
Azure firewall requires at least 64 addresses available.
If you look at the captions under the address space box, Azure will show how many addresses will be available for a given CIDR range. This will help in determining the correct range for your network.
If you set the CIDR prefix to something higher than 26, you will get an error that the CIDR prefix must be set smaller than 26.
7. Create a new Public IP or use an existing.
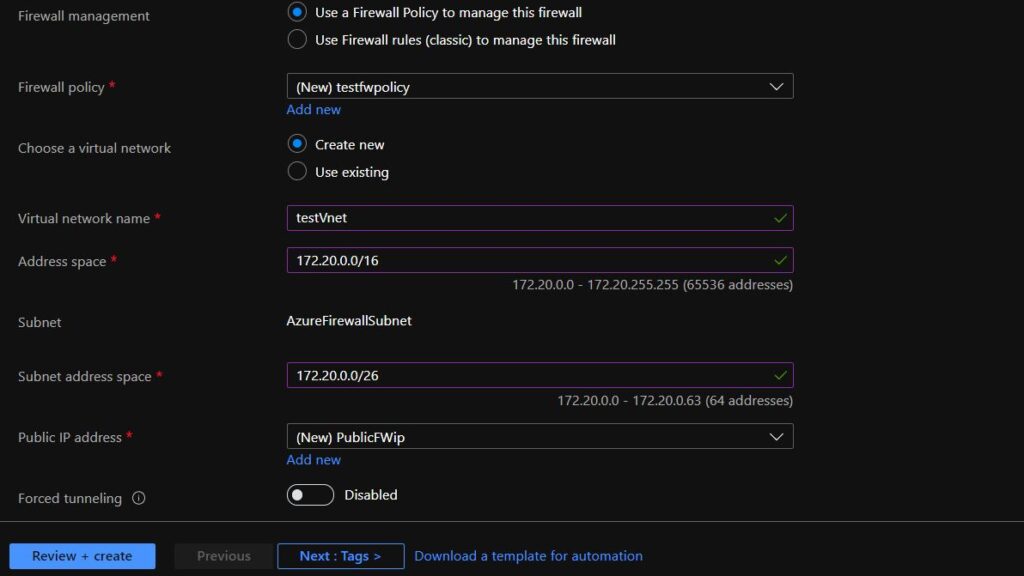
Then, click Review + Create.
Setting up the Route Table
While you are waiting Azure to create the Firewall, you have to create a route table. The route table will contain the network routes that will direct traffic from devices on the vNet to the firewall.
To create the route table:
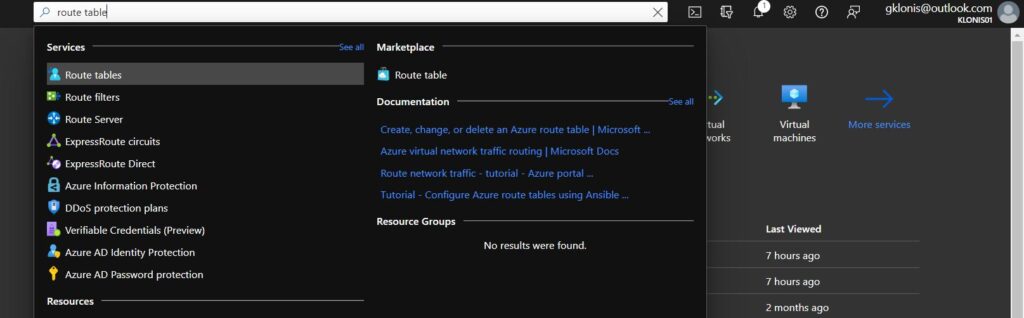
- Search for “Route tables” at the top search bar and open the Route tables blade in the Azure Portal.
3. click Route Table and then Create.
4. In the Create Route Table blade, provide:
Resource group – The resource group to add the route table resource to.
Region – The region to add the route table resource to.
Name – The name of the route table. Any name will work.
Propagate gateway routes – Set this option to Yes. In larger enterprise networks, this setting will advertise routes to other routers and gateways using routing protocols.
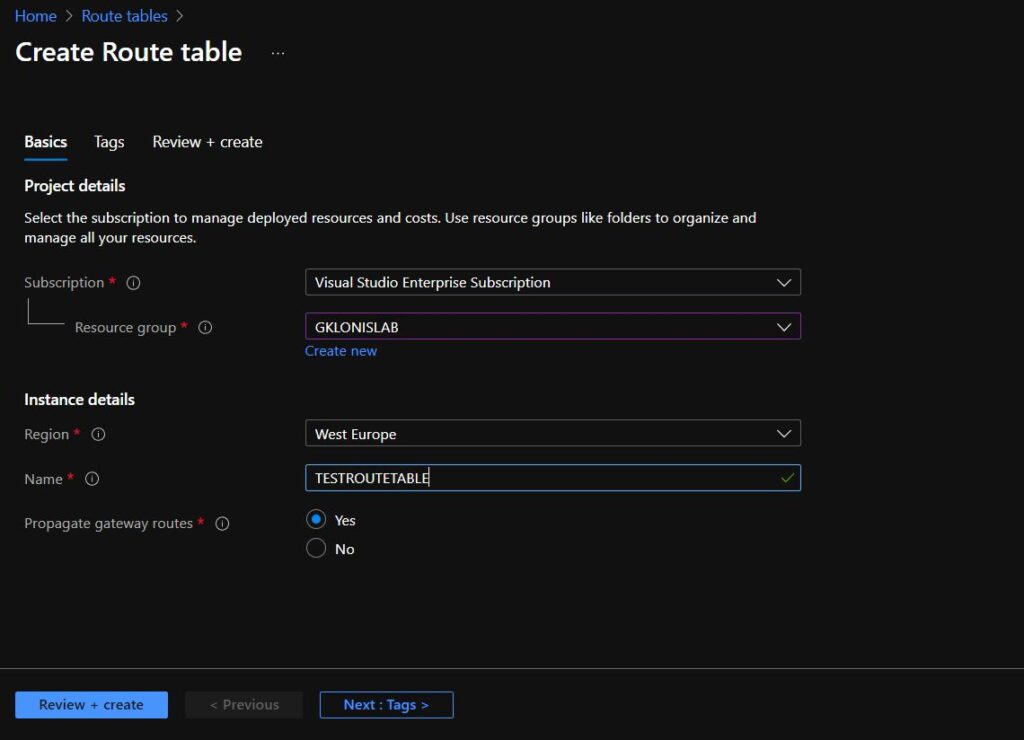
Then click Create.
Creating a Default Route
Now we have create the default route that all devices on the subnet will be protected. The default route will tell the devices attached to the vNet to send all Internet traffic to the firewall.
- Navigate to the route table we created earlier in the Azure Portal.
- Click on Routes from the left menu and then on Add.
- On the Add route screen, provide:
Route name –Choose a route name.
Address prefix – Since a default route or “default gateway” is always 0.0.0.0/0, input all 0s in CIDR notation. This prefix matches all traffic from a device in your subnet destined for an IP address, not in your subnet. 0.0.0.0/0 is a “catch-all” address.
Next hope type – Choose virtual appliance since the firewall is a virtual appliance.
Next hop address – The Azure Firewall’s private IP address.
When complete, click OK.

Next, on the default route you just created, click on Subnets —> Associate and select the vNet and subnet the devices you’d like the firewall to protect are attached to. This action will associate the default route to the subnet that your devices are using.
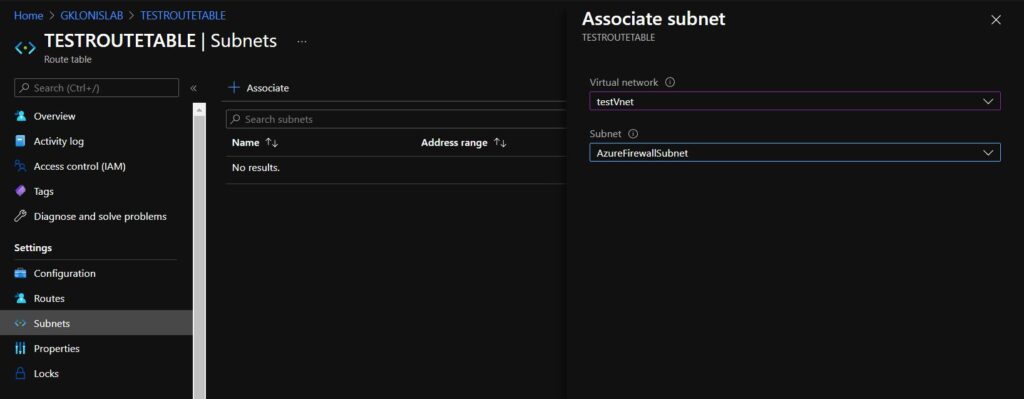
When complete, all devices attached to the subnet will start sending Internet traffic to the firewall.
Creating Azure Firewall Rules
Let’s create a Firewall rules to test it.
I have a Windows Server VM with a private ip address, no Public IP
As an example, i will create an Application Azure Firewall rule to allow Google navigation from my browser and a DNAT rule to access through RDP my server
- Search for “firewall policies” in the Search box and click on Firewalls Policies to access it in the Azure Portal.
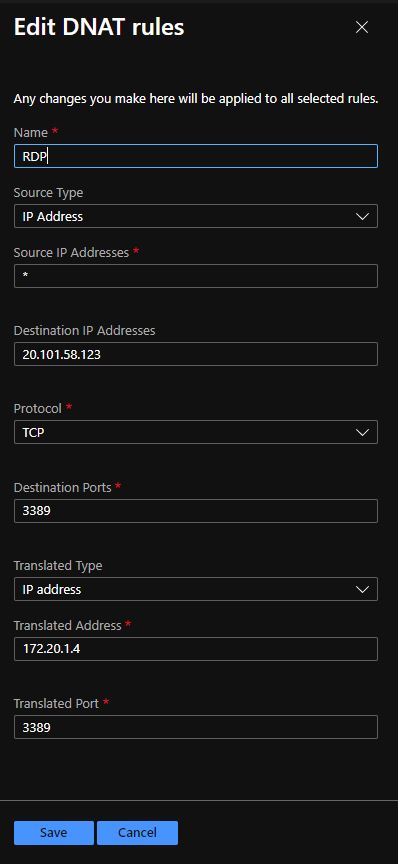
- Click DNAT rules from the left menu.
- I have created a NAT rule to provide RDP access to the virtual machine which is on the subnet, which is behind the firewall.
As you can see in the screenshot, i allow RDP access from ANY (source *) to my VM. In “destination” field i use the Azure Firewall Public IP address and the default port. In “translated address” i’m using the private IP of my VM and the default port for RDP.
Try to connect from any device on the internet to test it!
While my VM is behind the firewall, i have no internet access.
If you try to browse you will get the following error:
“HTTP request from 172.20.1.4:61124 to www.google.gr:80. Url: www.google.gr. Action: Deny. No rule matched. Proceeding with default action
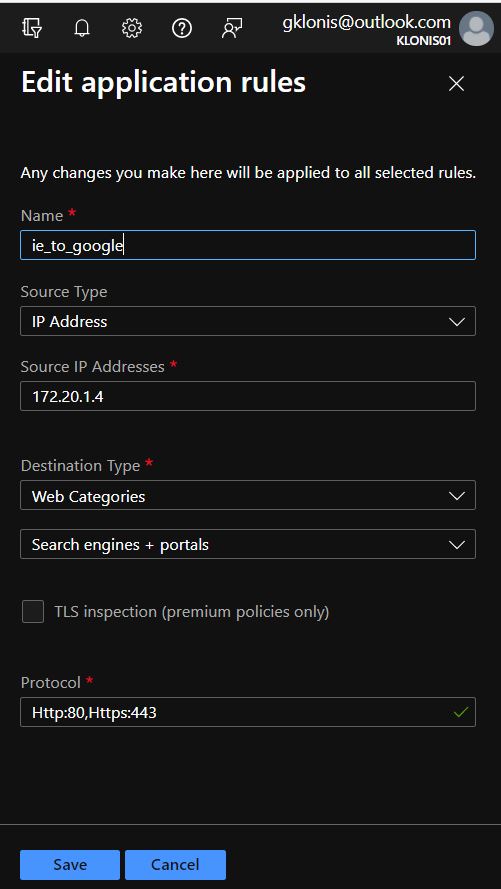
So, i have to allow the outbound traffic for http (80) and https (443) through the Azure Firewall.
4. Click on Application Rules, click add and the fill the fields as the screenshot below and you are done!
Hope you found the blog post useful.