
What is Application Proxy?
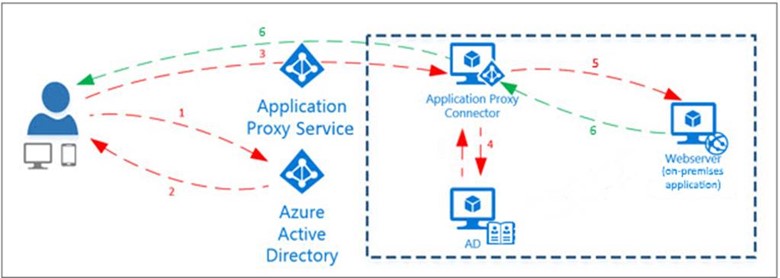
Azure AD Application Proxy is a great tool for publishing internal applications without exposing your servers to the Internet. If your applications require authentication for users to access them, you can get Azure AD to handle all this for you.
Application Proxy includes both the Application Proxy service that runs in the cloud, and the Application Proxy connector that runs on an on-premises server. Azure AD, the Application Proxy service, and the Application Proxy connector work together to securely pass the user sign-in token from Azure AD to the web application. The proxy does not require you to open any inbound ports through your firewall, the proxy connector simply connects outbound to Azure and all traffic is routed through that connection.
The Azure AD Application Proxy feature is available with Azure AD Premium P1 or P2.
Step 1: Install the connector
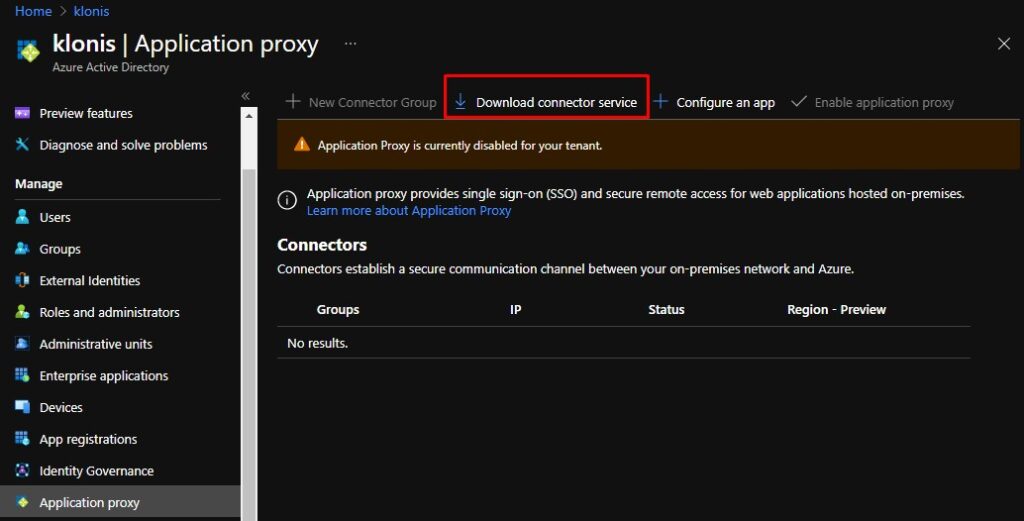
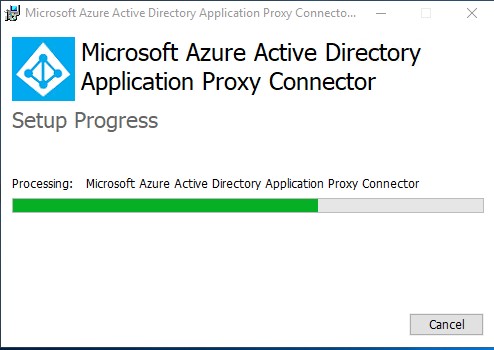
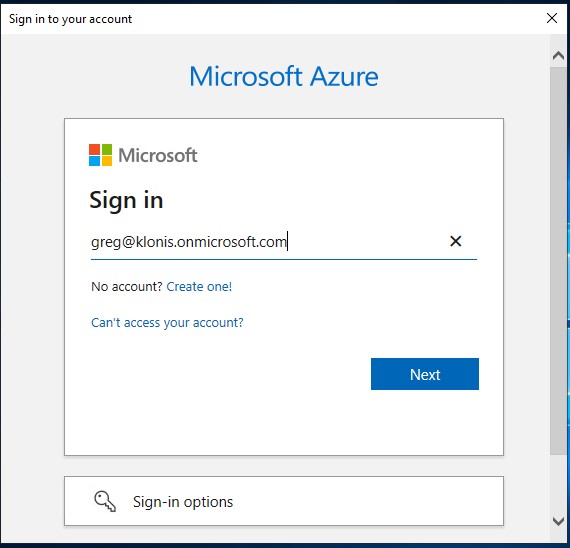
The first step is to go to the Azure AD Portal > Application Proxy section and download the connector service. Run the connector installer on a server which has network access to the services you wish to publish through the application proxy. The connector is supported on Windows Server 2012 R2 and newer editions.
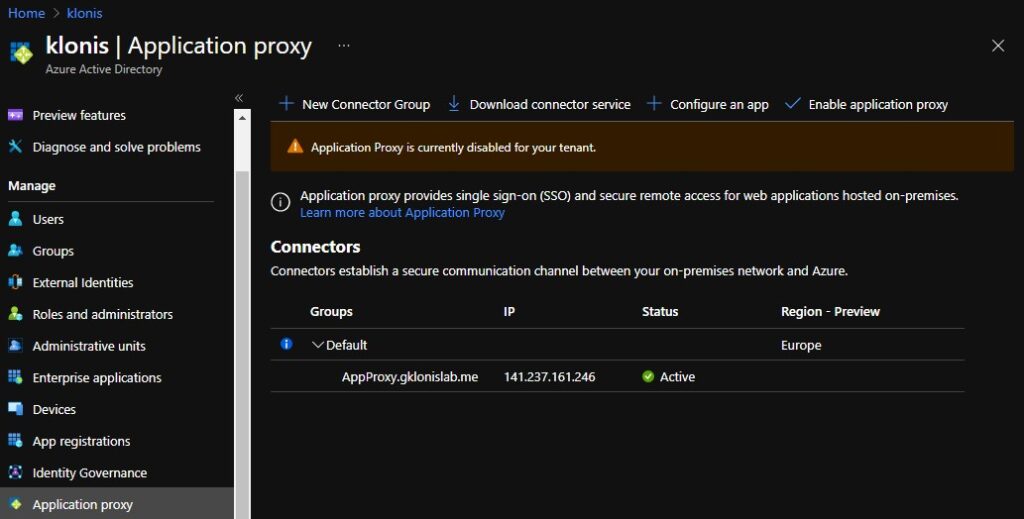
When finished you will need to go back to Azure AD > Application Proxy, you will see that there is now a connector group and inside it is a connector which should show its status as Active. Now we have got the connector set up, so click on Enable application proxy.
To ensure high availability of the application(s) you are publishing, we should install a second connector on another server.
Step 2: Creating an app
I have already setup an on-premises web server with anonymous access disabled.
Now we need to create the app we want to be able to access through the Application Proxy. Click on Configure an app.
The basic information you will need for this is the internal URL for the service you want to publish through the proxy, and perhaps the authentication you want to use. If you use Azure Active Directory then you will define who has permission in Azure, and those permitted access will be allowed through. The alternative is to use passthrough, where the authentication is handled by the internal application rather than by Azure.
When selecting the external URL, you will have to configure DNS and upload an SSL certificate if you use anything but the default msappproxy.net domain. A PFX file containing the certificate and private key works here. This address is what your end users will be using to access the internal service.
Step 3: Testing and tweaking
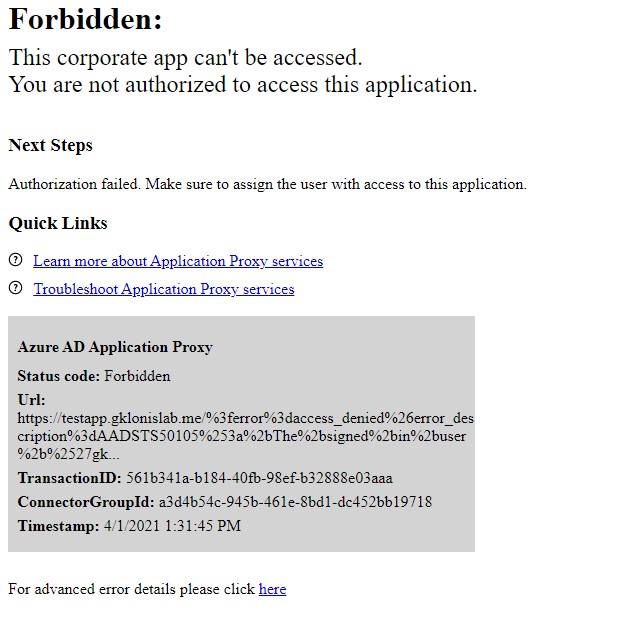
You should now be able to paste the external URL into a web browser and, if you left it at Azure AD pre-authentication, you’ll be prompted to log in. You’re likely to get an error saying “Forbidden: This corporate app can’t be accessed” at this time though – because we’ve not given anybody permission to use it.
Go to Azure AD > Enterprise Applications > All applications, then search for your app and click on it. You should then see some Getting Started icons – click on the first one to assign users and groups and then Add user/group. Select the users or groups you want to have access and click Assign.
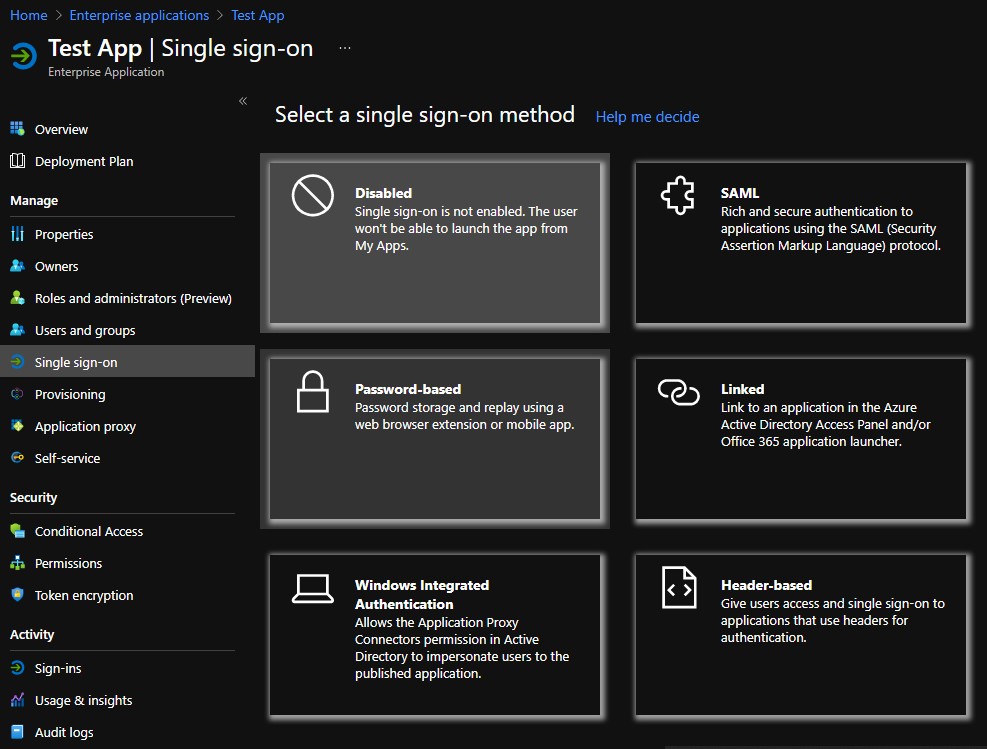
Finally, if you want to enable Single Sign On, Clicking this item on the menu will ask you which SSO method you want to use:
Click on Windows Integrated Authentication to change the mode and you will be asked some questions. I ran through this publishing an IIS hosted site with Windows Authentication enabled.
You will need the application’s SPN – Service Principal Name. You will then need to select the delegated logon identity – do you want it to impersonate the sAMAccountName, or the userPrincipalName, or some other option?
Before we can configure this, we will need to set up Kerberos Constrained Delegation for the Application Proxy Connector. We will also need the SPN used by the application you want to publish.
Open Active Directory Users and Computers and find the computer which is running the connector. Open up the Properties and go to the Delegation tab. Select Trust this computer for delegation to specified services only and Use any authentication protocol. Click on Add to add the SPN for your service – you will need to enter the computer name when prompted, and then select from a list of SPNs published for that computer in Active Directory.
