
Pre-Upgrade
Upgrade path:
Windows Server 2008 R2 can be upgraded to Windows Server 2019 in three consecutive upgrade processes – first by upgrading to Windows Server 2012, and then upgrading Windows Server 2012 to Windows Server 2016, and then upgrading from Windows Server 2016 to Windows Server 2019.
Support:
In-place Upgrade is supported for Windows Server versions 2008 R2, 2012 R2 and 2016 on physical hardware, and in Virtual Machines. Public and private cloud companies also support In-place Upgrade of Windows Server versions 2008 R2, 2012 and 2016 Virtual Machines – check with your cloud provider.
Alternative:
Migrate (re-deploy) applications and data on a clean install of Windows Server 2019.
Limitations:
Windows Servers configured to “Boot from VHD” cannot be upgraded using In-place Upgrade.
Planning for In-place Upgrade
Before proceeding with In-place Upgrade, collect the following information:
- Is there a target or goal timeframe for upgrading this server?
- Is this a production-critical server?
- Is there a maintenance window for upgrading this server?
- Is there enough time for a test upgrade on an identical or similar non-production server?
- Who uses this server? Internal users, external users, or both? Have they been informed of the upgrade or maintenance?
- Is there an inventory of what is running on the server? Check the following:
- Windows Server Roles and Features
- Microsoft applications: SQL Server, SharePoint Server, Exchange Server, etc.
- 3rd-Party applications: SAP, Oracle, DB2, etc.
- Is the server joined to an Active Directory domain?
- Are any of the server disks BitLocker protected?
- Is the server part of a Failover Cluster? Note that Failover Clusters have separate migration options.
- How often is the server backed-up? Have backups ever been successfully restored (applied) to the server or applications?
- What backup software is used?
- If In-place Upgrade is not successful and the server needs to be rebuilt, are the Windows Server and application install media available? Although it is rare, In-place Upgrade can fail and there should be a plan in-place for this possibility, to minimize server downtime and maintain SLAs.
- Is the server fully patched? It is strongly recommended that the server is fully patched prior to In-place Upgrade.
- Run systeminfo.exe and save the output:
- Run ipconfig /all and save the output:
- Use the Server Manager to list the Roles and Features installed on the server.
- Run RegEdit and capture the value of the the HKEY_LOCAL_MACHINE\SOFTWARE\Microsoft\WindowsNT\CurrentVersion hive – this will show the exact version (BuildLabEx) and edition (EditionID) of Windows Server:
Before proceeding with the In-place Upgrade
- Backup the Operating System, Applications, and Virtual Machines.
- Shutdown, Quick Migrate, or Live Migrate all Virtual Machines running on the server – Virtual Machines cannot be running on the server during In-place Upgrade.
Upgrade
1 of 3: Windows Server 2008 R2 to Windows Server 2012
- Locate the setup media for Windows Server 2012
- Run setup.exe by double-clicking it:
- Click Yes to enable setup to proceed:
- Click Install now:
- For internet-connected devices, click Go online to install updates now:
- You will be prompted to select the image of the Edition to upgrade to. Then click Next:
- Depending on the distribution channel that you received Windows Server media from (Retail, Volume License, OEM, ODM, etc.) you may be presented with different license agreements. Click “I accept the license terms” and then click Next:
- For In-place Upgrade, select Upgrade: Install Windows and keep files, settings, and applications:
- Setup will remind you to check application compatibility – click Next:
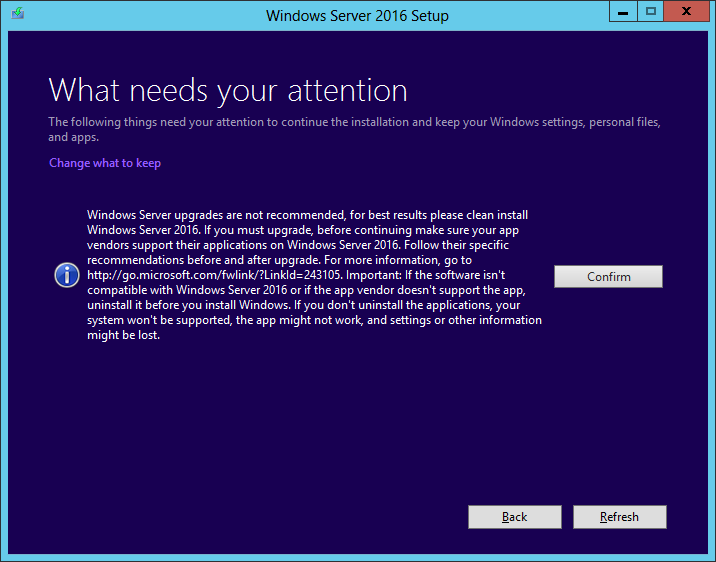
- In the Windows Server 2016 setup.exe, one page says that upgrade is not recommended, in order to encourage customers to prefer clean install.
Note this page has been removed from Windows Server 2019 setup.exe. Press Confirm:
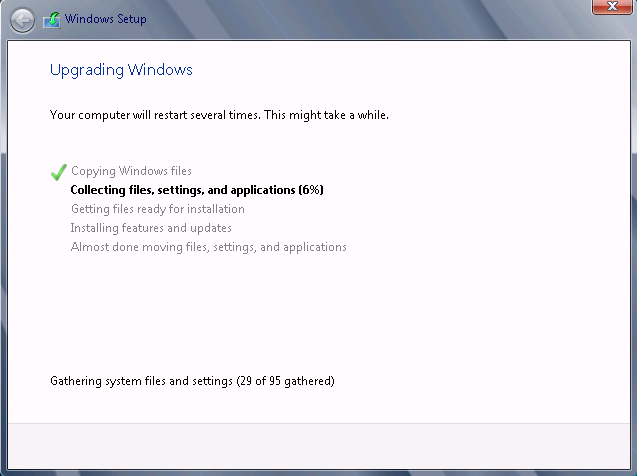
- Setup will complete and the server will reboot.
Post Upgrade: Windows Server 2012
- After Setup has completed installing and rebooted the sever, login to check that the server has been successfully upgraded. If you selected Windows Server 2012 Standard or Datacenter Desktop Edition, you should see the Server Manager window:
- Run RegEdit and check the value of the HKEY_LOCAL_MACHINE\SOFTWARE\Microsoft\WindowsNT\CurrentVersion hive – the version should be successfully updated to Windows Server 2012.
- Check that applications are running and that client connections to the applications succeed.
- If you believe that there has been an issue upgrading you server, you should copy and Zip the %SystemRoot%\Panther (usually C:\Windows\Panther) directory and contact support.
Upgrade 2 of 3: Windows Server 2012 to Windows Server 2016
- Patch the server. It is strongly recommended that the server is fully patched, even if your previous Windows Server 2008 R2 was fully patched.
- Backup the Operating System, Applications, and Virtual Machines.
- Locate the setup media for Windows Server 2016
- Run setup.exe by double-clicking it:
- Click Yes to enable setup to proceed:
- For internet-connected devices, we recommend the Download updates, drivers and optional features option. Click Next:
- Setup will check the configuration of your computer – please wait:
- Depending on the distribution channel that you received Windows Server media from (Retail, Volume License, OEM, ODM, etc.) and the license for the server, you may be prompted to enter a licensing key to proceed:
- You will be prompted to select the image of the Edition to upgrade to. Then click Next:
- Depending on the distribution channel that you received Windows Server media from (Retail, Volume License, OEM, ODM, etc.) you may be presented with different license agreements. click Accept:
- For In-place Upgrade, select Keep personal files and apps, and then click Next:
- In the Windows Server 2016 setup.exe, one page says that upgrade is not recommended, in order to encourage customers to prefer clean install.
Note: this pages has been removed from Windows Server 2019 setup.exe. Press Confirm:
- Setup will remind you to remove Microsoft Endpoint Protection:
- To remove Microsoft Endpoint Protection: Open the Control Panel | Programs and Features, and Uninstall using the right-mouse menu option:
- When the analysis phase is complete, setup will prompt you to press Back to change choices, or to proceed with the In-place Upgrade, press Install:
- On the Ready to install screen, click Install to start the installation.
- Setup will proceed with the In-place Upgrade, and then the server will reboot:
- Setup will complete and the server will reboot.
Post Upgrade: Windows Server 2016
- After Setup has completed installing and rebooted the sever, login to check that the server has been successfully upgraded. If you selected Windows Server 2016 Standard or Datacenter Desktop Edition, you should see the Server Manager window:
- Run RegEdit and check the value of the HKEY_LOCAL_MACHINE\SOFTWARE\Microsoft\WindowsNT\CurrentVersion hive – the version should be successfully updated to Windows Server 2016.
- Check that applications are running and that client connections to the applications succeed.
- If you believe that there has been an issue upgrading your server, you should copy and Zip the %SystemRoot%\Panther (usually C:\Windows\Panther) directory and contact support.
Upgrade 3 of 3: Windows Server 2016 to Windows Server 2019
- Patch the server. It is strongly recommended that the server is fully patched, even if your previous Windows Server 2012 was fully patched.
- Backup the Operating System, Applications, and Virtual Machines.
- Locate the setup media for Windows Server 2019
- Run setup.exe by double-clicking it:
- Click Yes to enable setup to proceed:
- For internet-connected devices, we recommend the Download updates, drivers and optional features option. Click Next:
- Setup will check the configuration of your computer – please wait:
- Depending on the distribution channel that you received Windows Server media from (Retail, Volume License, OEM, ODM, etc.) and the license for the server, you may be prompted to enter a licensing key to proceed.
- You will be prompted to select the image of the Edition to upgrade to. Then click Next:
- Depending on the distribution channel that you received Windows Server media from (Retail, Volume License, OEM, ODM, etc.) you may be presented with different license agreements. Click Accept:
- For In-place Upgrade, select “Keep personal files and apps” and then click Next:
- When the analysis phase is complete, setup will prompt you to click Back to change choices, or to proceed with the In-place Upgrade. Click Install:
- Setup will proceed with the In-place Upgrade, and then the server will reboot:
- Setup will complete and the server will reboot.